[vc_row][vc_column][vc_column_text]
Introducing our GUEST BLOGGER—Leslie Dunegan of Cornerstone Design WACO
[/vc_column_text][vc_single_image image=”3435″ img_size=”large” alignment=”center”][vc_column_text]Message from the owner:
When I was young, my father had me help with several home projects that ranged from painting to building houses. I enjoyed working with my hands and eventually started helping my friends and neighbors with their remodeling projects or paint jobs. I even put myself through college by remodeling homes. I didn’t know it at first, but remodeling would be the business I would dive into for the next 38 years.
As a father, my daughters grew up watching us develop our home remodeling business and grew to love different aspects of it. My oldest daughter Stephanie is our Assistant Manager and is learning the business to manage it in the coming years. My other daughter, Leslie, has a real talent for interior design and décor. She actually started her business with her husband in Waco, Texas called Cornerstone Design specializing in countertops.
Although we are in neighboring states, my heart is close to their family and it makes me proud to see how remodeling is running through the generations of our family tree.
It is my pleasure to introduce our guest blogger this week—Leslie Dunegan of Cornerstone Design.
Enjoy,
Tom Poulin
Owner of Poulin Design Center[/vc_column_text][/vc_column][/vc_row][vc_row][vc_column][vc_row_inner][vc_column_inner][vc_column_text]
Shelf Styling 101
[/vc_column_text][vc_raw_html]JTNDaWZyYW1lJTIwd2lkdGglM0QlMjI4MDAlMjIlMjBoZWlnaHQlM0QlMjI0NTAlMjIlMjBzcmMlM0QlMjJodHRwcyUzQSUyRiUyRnd3dy55b3V0dWJlLmNvbSUyRmVtYmVkJTJGSGtfR2poUlo1TFElMjIlMjBmcmFtZWJvcmRlciUzRCUyMjAlMjIlMjBhbGxvdyUzRCUyMmFjY2VsZXJvbWV0ZXIlM0IlMjBhdXRvcGxheSUzQiUyMGNsaXBib2FyZC13cml0ZSUzQiUyMGVuY3J5cHRlZC1tZWRpYSUzQiUyMGd5cm9zY29wZSUzQiUyMHBpY3R1cmUtaW4tcGljdHVyZSUyMiUyMGFsbG93ZnVsbHNjcmVlbiUzRSUzQyUyRmlmcmFtZSUzRQ==[/vc_raw_html][vc_column_text]While perusing Pinterest or Instagram you may see beautifully styled open shelves or bookcases. Maybe you go to Hobby Lobby or Target and see many different jars, botanicals, or books, and wonder “how can I use these items in my decor?” Today we are going to show you how to style your shelves, which types of mediums to use and how to create that Pinterest worthy shelf in your home.[/vc_column_text][/vc_column_inner][/vc_row_inner][vc_column_text]
Elements to Incorporate
Choosing your styling items can be a fun process especially if you incorporate personal items as well. Here are a few items you may want to use when filling your shelves.
- Potted plants or vases. These do not have to be real plants, they can be faux, silk or even rubber. Don’t let the stress of trying to keep a real plant alive stop you from making your shelves look the way you want.
- Books. Books add color, height, and symmetry to your shelf. You can use all one color, or ad a mix of tones that complement the decor you already have. The ideas are limitless when using books.
- Candlesticks. Candlesticks are another great way to add height and interest to your shelf but they also add history. Thrift stores or flea markets are great places to find old, ornate candlesticks to a space. Mix up the metals or material and let it tell a story on the shelf.
- Jars. Using jars help to bring in funky shapes, new texture, and even height to a space. With jars you can pick several different types. All types of jars, from amber glass to terra-cotta to a milk glass add different styles, textures, and trends to your shelf. Don’t be afraid to let your eclectic side come out with this item.
- Framed Art. Art adds color, texture, tells a story and can add a personal touch. When picking art make sure it’s something that you love and would like looking at. Mix up the frame material and don’t be afraid to layer your art.
Start Stylizing Your Shelf
Now comes the fun part…adding all your unique and specials finds together to make a cohesive, creative, styled shelf.
1. First, we are going to start with your largest item. This serves as our anchor point for the shelf. Everything else will be built around this one item. Most of the time, a framed piece of art or a family picture will be your anchor.
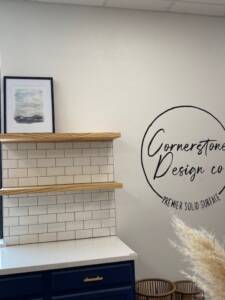
2. Layering that anchor point will add dimension and interest to the piece. Have fun pairing it with a similar or even complete opposite piece of art or picture.
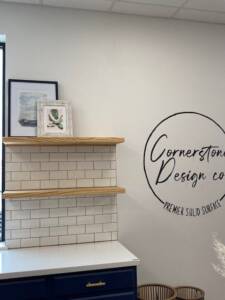
3. Add a potted plant to help balance the shelf. If your anchor piece is tall, you will want it to favor one side, and balance out the other side with a slightly smaller botanical. This provides balance but also a change in shape and texture.
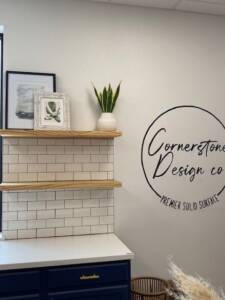
4. Up until this point most of our items have been tall and large. We want to help fill gaps and bring the interest down, so adding a smaller plant is a must. You can mix up the pot color or even shade of botanical with this smaller plant.
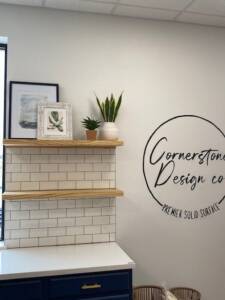
5. Your first shelf is done! Remember less is more! And sometimes it requires standing back and staring for a while…
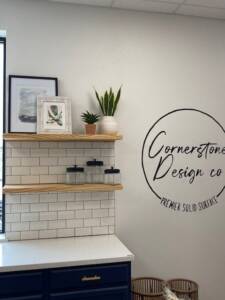
6. Moving on to the next shelf we want to remember balance is key but also add in some new textures we didn’t do on the previous shelf.
7. Adding glass jars that are different heights will allow for a clean, crisp look to the shelf. It gives shine and you can also fill those jars with useful items. Maybe the shelves are in a laundry room. Fill those jars with clothespins, or laundry pods. The ideas are endless.
8. Let’s break out the books and find one or two that can create height for your space. You are creating a pedestal for your last item.
9. The last item is a potted plant. Choosing one that is wider and more vine-like can fill up space on the shelf. Adding this final plant creates a triangle effect between the top and bottom shelf. This helps to balance the shelves and create a cohesive look.
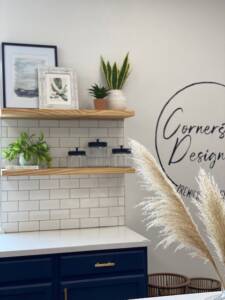
Remember when styling your shelves, it doesn’t have to have to be brand new items, it can be comprised of some of your favorite family heirlooms or precious books. Make it reflect your style, your home, and the things you want to put on display.[/vc_column_text][/vc_column][/vc_row]


